Interaction
While EasyMaker3D is designed to be reasonably intuitive, there are a few things that may need explanation before you can use it effectively.
Clicking and Dragging
EasyMaker3D responds to mouse and keyboard actions in any of the three VR/non-VR modes. Note that the left mouse button is used for all click and drag actions. The right mouse button is used to change the view orientation.
VR Only
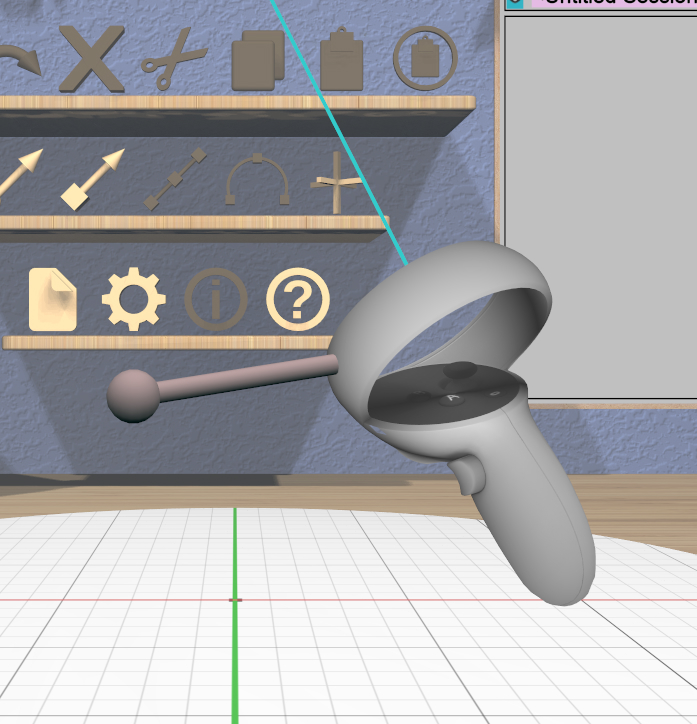
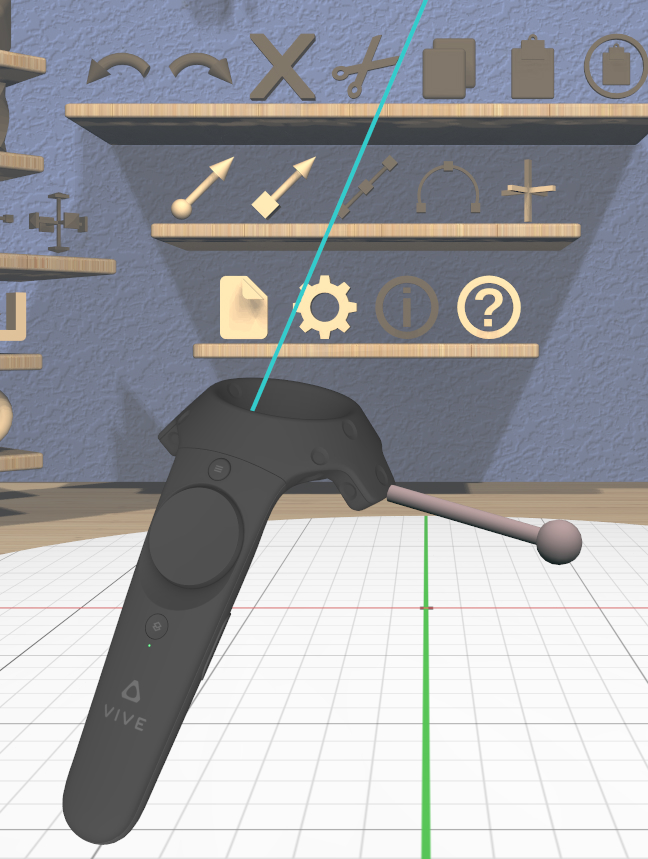
In either of the VR modes, the controllers appear in the VR scene as in these images (one showing a Vive controller and the other showing an Oculus Touch controller).
Controller use is as follows:
A cyan laser pointer emanates from the forward direction of each controller. the pinch action (usually the trigger button) activates whatever the laser hits, if it is interactive. The pinch action is used for the controller equivalent of clicking and dragging with the mouse.
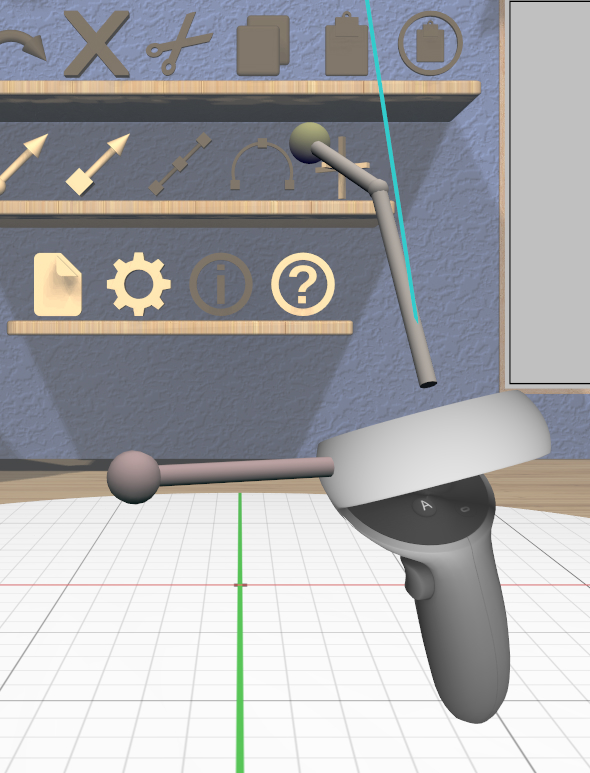
Some interactive elements allow you to use a controller’s grip button to push or pull some affordance; this is called grip dragging. In this case, a grip hover guide will be visible as in these images. The hover guide will have a line connected to the interactive item that will be activated when the grip button is pressed, if any. See the sections on the specific items that support grip dragging for more details. Grip dragging can be much easier to control than dragging with the laser pointer.
Modified Interaction Mode
Some interactive objects have two different modes of operation, regular and what is referred to as modified mode. This can apply to clicking a button (”modified-clicking”), dragging (”modified-dragging”), or selection (”modified-selecting”).
Modified mode is activated by either of these:
Holding down the shift key on the keyboard
Double-clicking with the mouse, pinch, or grip button. Note that this works both for modified-clicking and for modified-dragging (press-release-press-drag).
For example, when clicking on a model to select it, the modified version is to add the model to the current selection or to deselect it if it is already selected. When dragging a handle in the Scale Tool, the modified version performs a symmetric scale about the model’s center point instead of an asymmetric scale. Other uses are described elsewhere in this guide.
Keyboard Shortcuts
All built-in keyboard shortcuts are listed in the Cheat Sheet. Shortcuts are available in all three application modes.
Adding Custom Shortcuts
You can change the built-in shortcuts or add your own by placing a file named shortcuts.txt in the main EasyMaker3D folder before running the application. The format of this file is as follows:
Lines with only white space are ignored.
Lines beginning with ‘#’ (after optional white space) are comments and are ignored.
Every other line should be in the format:
key-string action-nameA key-string consists of optional modifiers and a key name. Modifiers are Shift-, Ctrl-, and Alt-, in any order. A key name is any single unshifted character (except space) or any of the special key names in the table below.
The action-name corresponds to one of the available EasyMaker3D actions listed in the Cheat Sheet.
Special key names are:
Backspace |
Escape |
KPDecimal |
Left |
PrintScreen |
CapsLock |
F1-F25 |
KPDivide |
Menu |
Right |
Delete |
Home |
KPEnter |
NumLock |
ScrollLock |
Down |
Insert |
KPEqual |
PageDown |
Space |
End |
KP0-KP9 |
KPMultiply |
PageUp |
Tab |
Enter |
KPAdd |
KPSubtract |
Pause |
Up |
Example shortcuts.txt file:
# This is a comment that is ignored.
Shift-1       CreateBox
Shift-Ctrl-s  ScaleTool
Alt-u         CombineCSGUnion
Ctrl-Right    SwitchToNextTool
Note that custom shortcuts are processed after the built-in ones, so you can override key mappings for built-in shortcuts.
The Stage
The stage is the large disc on the floor of the work area. Models are placed at the center of the stage by default when they are created.
The stage can be manipulated as follows to change your view of the models. Any rotation or scale change to the stage applies to the models on it as well.
Drag it in a circular arc to rotate it.
Drag toward or away from the stage center to scale the stage up or down.
A mouse scroll wheel can also be used to scale the stage.
Modified-clicking anywhere on the stage resets it to its default size and rotation.
Rotating and scaling the stage is a fairly easy way to get a different perspective on your models without modifying the models themselves. Another option is to use inspector mode.
Viewing
EasyMaker3D is designed to be maintain a relatively stable viewpoint. However, there may be times when you want to change the view of the entire scene (in addition to manipulating the stage or using inspector mode).
VR Only
In full VR mode, you can turn your head to see the room from different angles, if you wish.
Dragging with the right mouse button rotates the view in the application window. Additionally, the height slider on the pole on the right side of the work area can be dragged up and down to raise and lower your view of the room. Clicking on the pole or the slider brings you back to the default height. Modified-clicking on the pole or slider also resets the view direction in the window in addition to the height.
Panel Touch Mode
VR Only
Panel touch mode allows for a more natural style of 2D interaction in VR. When in VR and any of the 2D Panels is visible for active use, a touch affordance is added to each controller, as in this image. The touch affordance is like a virtual finger that can be used to interact with the Panel. Touching the tip of this affordance to an interactive Panel element (such as a button or slider thumb) activates that element. The controller will vibrate briefly when this happens for feedback.
Radial Menus
VR Only
In either VR mode, pressing the menu button on a controller activates a radial menu attached to the corresponding controller in the scene. Each button in a radial menu is a shortcut to some application action. Note that the menu button on an Oculus Touch controller is “Y” or “B”.
Depending on the specific type of controller, you can move your thumb on the trackpad or push the joystick to highlight the desired button and then press the trackpad or joystick button to activate it. The menu is dismissed when you press the menu button again.
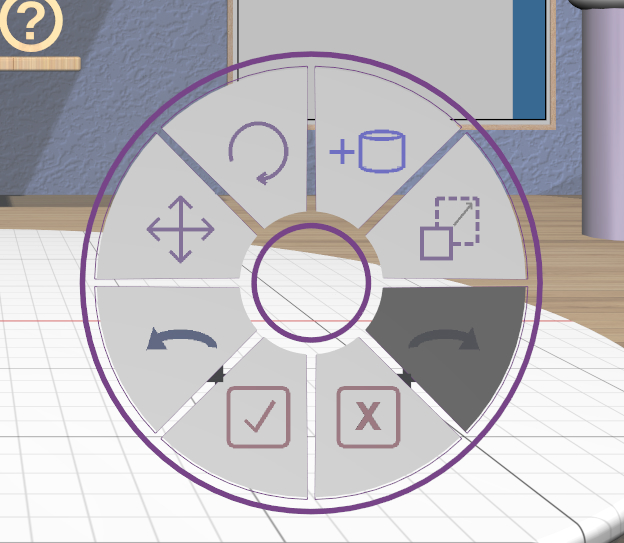
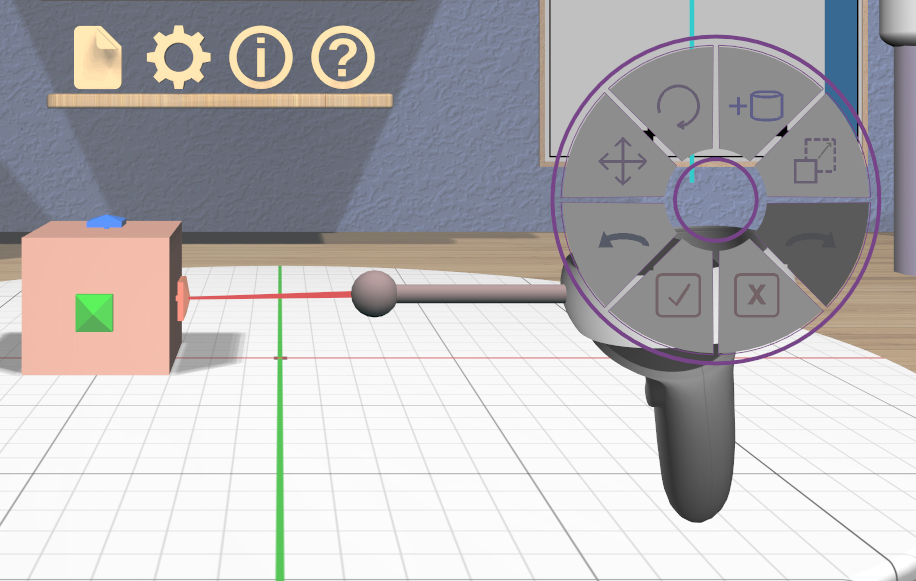
Radial menus are also available for use with the mouse in conventional mode via keyboard shortcuts. In this mode, the menu appears in a fixed position on the appropriate side of the window for interaction with the mouse, as shown in this image.
The Settings Panel allows you to change the number of buttons in each radial menu and to define the actions associated with each button. Almost anything you can do in the application can be assigned to a radial menu button; the icons associated with each action are listed in the Cheat Sheet. If any action cannot be applied at the current time, the corresponding button will be disabled (dark gray). By default, all buttons are set to the None action (null sign icon), which is always disabled and has no corresponding effect.
Inspector Mode
EasyMaker3D provides a special inspector mode that lets you easily examine a model from all directions. To inspect a model, first select it as the primary selection, and then click on the inspector action icon. Alternatively, you can long-press (more than a half-second or so) either the left mouse button or a VR pinch action on a model, whether selected or not. There is also a keyboard shortcut.
When the mouse or keyboard shortcut is used to enter inspector mode, the selected model will be shown in the middle of the application window at an appropriate size (relative to the current view. Moving the mouse (without pressing any buttons) rotates the model.
Any key press, mouse click, or controller button press exits inspector mode.
VR Only
If inspector mode is initiated with either controller, the selected model will be attached to that controller in the scene. You can move and turn the controller in your hand to see the model from all angles.
Highlighting and Tooltips
Everything in the application that is interactive responds to hovering with the mouse or laser pointer by highlighting in some way. For most items, if you hover long enough, a tooltip will appear with information about the interaction. For example, hovering on a 3D icon (even if it is disabled) gives information about what the icon does when pressed, and hovering on any model in the scene shows the name of the model.
The delay for showing tooltips is a setting that can be edited in the Settings Panel. Setting the delay to 0 turns off tooltips completely.
Text Input
Some of the 2D Panels require text input, such as editing the name of a model or entering the name of a new file. Using the mouse and keyboard is always an option for entering and editing text.
VR Only
If you are wearing the VR headset and activate a text input field, a virtual keyboard will appear as a new Panel in the scene. This keyboard allows you to use panel touch mode to enter and edit text.